Authenticating Users Via OEM OAuth
Organization owners might take over the authentication of their users when access is only via REST API and not a browser. Authentication is done by exchanging a JWT token signed by the organization owner for an OAuth Access Token to TIBCO Cloud, see RFC 7521. Such a solution is suitable for an OEM setup. The following diagram shows the protocol:
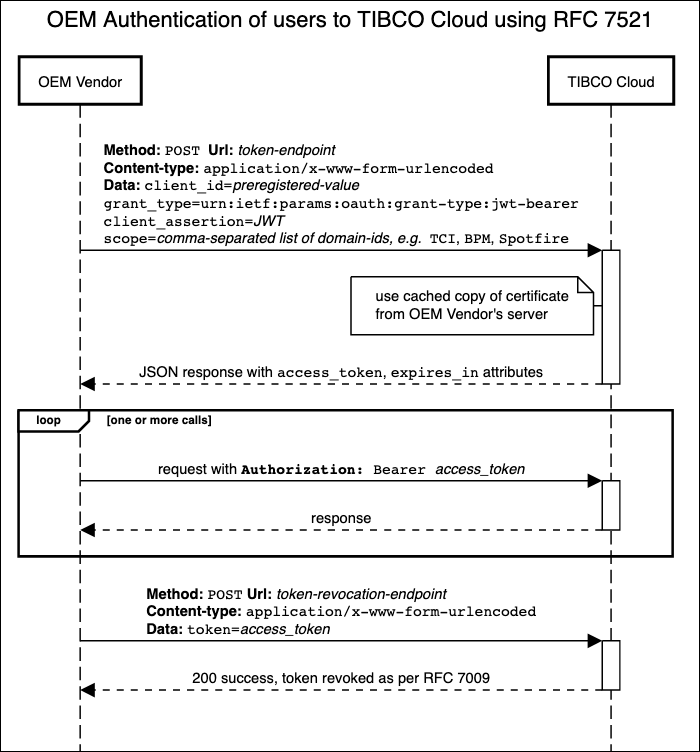
JWT must be signed by using the RSA algorithm. The public key must be accessible in the JWKS format from a registered URI (RFC 7517).
Prerequisites
To use OEM OAuth, you must fulfill the following conditions:
-
OAuth client must be registered for your organization.
-
When registering the OAuth client, you must have the following required parameters:
-
JWKS_URI (for details, see RFC-7517) hosting certificates
-
Value of issuer of JWT (for example, www.example.com)
-
The following table lists the required attributes in the JWT:
| Attribute name | Description |
|---|---|
| jti | Unique ID. It is used to catch any replay within the validity period. |
| iss | Issuer. Must match what is given when registering the client. |
| aud | Audience, an array of strings. Must include the token endpoint. For example, https://account.cloud.tibco.com/idm/v1/oauth2/token |
| sub | Subject. Email address of the subscriber. The user must exist in the subscription. |
| iat | Issued at. Must be the current Epoch time as seconds since 1 January, 1970. For example, 1579731366 is Wednesday, 22 January, 2020 10:16:06 PM UTC. |
| nbf | Not before. Expressed as Epoch Time in seconds. Set it to a few seconds before now. This is to account for non-synchronized clocks. |
| exp | Expiration expressed as Epoch Time in seconds. Set it to no more than 8 hours in the future. |
Note: In the example for the attribute aud, the token endpoint listed is for the US-West-2 (Oregon) region. If you have subscriptions in other regions, the token endpoints are as follows:
-
Australia: https://au.account.cloud.tibco.com/idm/v1/oauth2/token
-
Azure: https://account.us.azure.cloud.tibco.com/idm/v1/oauth2/token
-
Europe: https://eu.account.cloud.tibco.com/idm/v1/oauth2/token
-
US East: https://us-east.account.cloud.tibco.com/idm/v1/oauth2/token
For each token endpoint, there is a corresponding token revocation endpoint. The corresponding path is idm/v1/oauth2/tokens/operations/revoke.
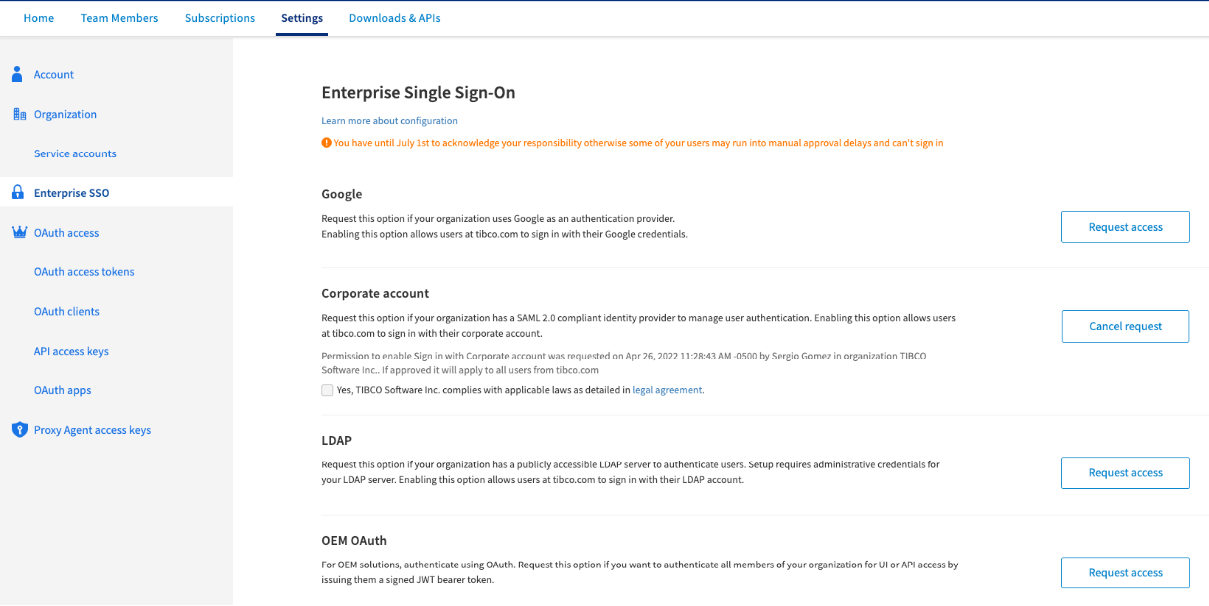
Requesting Permission to Authenticate by Using OEM
Given the sensitive nature for all the users in authentication enabling, this feature requires prior approval. To request permission to enable authentication by using OEM:
- Procedure
-
On the Settings tab, in the Enterprise SSO section, click Request OEM OAuth.
-
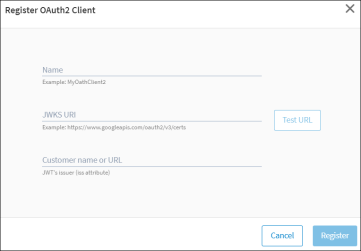
In the Register OAuth2 Client dialog, enter the necessary information, and then click Send.
You can cancel your request before it is approved. In the Enterprise SSO section, click the Update button next to OEM OAuth.
An email notification is sent to you after the request is approved. You can check the status of your request on the Settings tab.
Note: After you register an OAuth client, an invitation email is sent if you invite users from the Team Members tab. Use Bulk User Management API if you want to skip sending emails. For more details about Bulk User Management, visit the User Management APIs page.Warning: When the user you are inviting does not belong to your email domain, an invitation email is always sent to the user. -
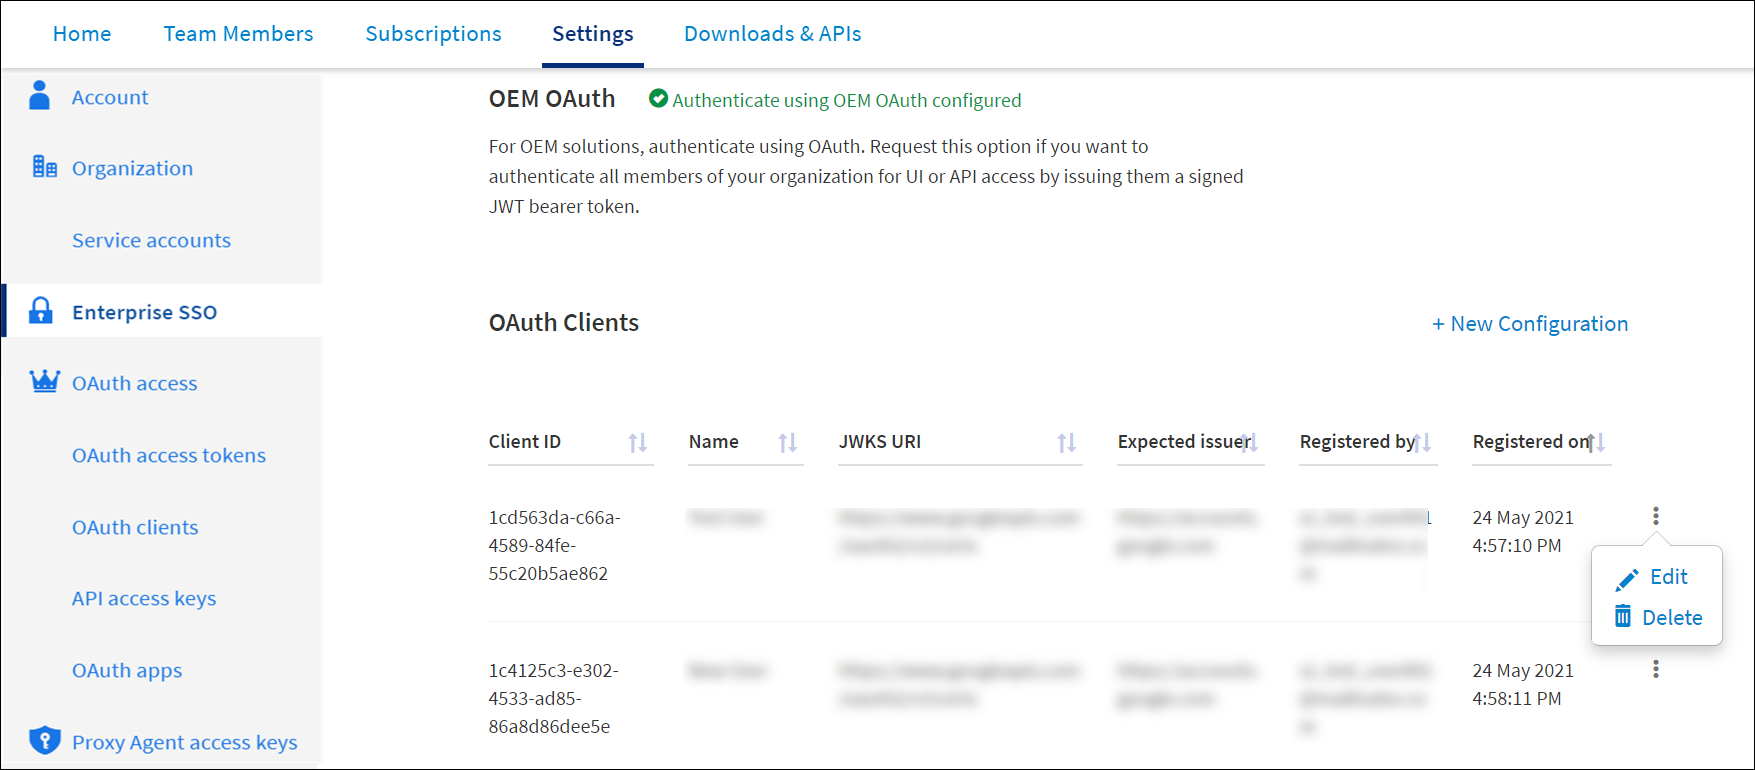
After your request has been approved, in the OAuth Clients section, click the New configuration link.
If you cannot see the link, refresh the page.
-
In the Register OAuth2 Client window, fill in the information, and then click Test. After you see a message informing you that the test has been successful, click Register.
If an error occurs, make necessary change,s and then click Test again until the test is successful. When the test is successful, the client you have added is displayed in the list of OAuth Clients.
-
You can edit or delete the clients by clicking Edit or Delete as required.
Note: Deleting a client also deletes all the tokens issued to the client.